


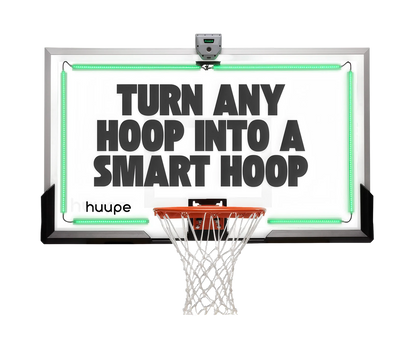
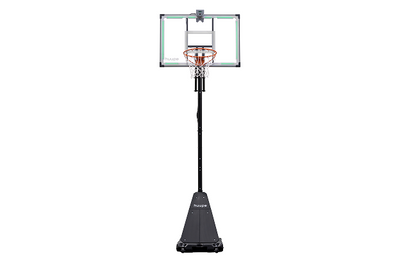
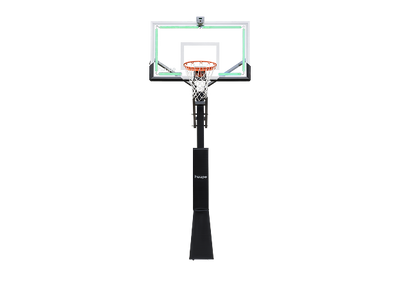

huupe ARENA – Portable

Instructions
Owners must ensure that all players understand and follow these safety rules.
- Read all instructions carefully before assembling or using this system.
- Before beginning assembly, check all packaging materials and confirm that all parts and instructions are included. Use the parts list to verify components.
- Proper assembly, use, and supervision are essential to reduce the risk of injury. Failure to follow these instructions may result in serious injury or property damage.
- At least two adults are recommended for installation. Use caution when working with ladders.
- Do not hang on the rim, backboard, or support structure. Keep hands and fingers clear of moving parts during adjustment. Children should not operate or adjust the system without adult supervision.
- Use extreme caution when using a ladder during assembly.
- The minimum operational height is 8 ft (3.35 m) to the bottom of the backboard.
- Read and understand the warning label affixed to the pole before use.
- The lifespan of the basketball pole depends on several factors, including climate, placement, and exposure to corrosive materials such as pesticides, herbicides, and salts.
- Adult supervision is recommended when adjusting the height of the system.
Read and understand the warnings listed below before using this product. Failure to follow these warnings may result in serious injury and/or property damage.
- Do not hang on the rim or any part of the system, including the backboard, support braces, or net. During play, especially when performing dunk-type activities, keep your face away from the backboard, rim, and net.
- Serious injury may occur if the face or teeth come into contact with the backboard, rim, or net.
- When adjusting the height or moving the system, keep hands and fingers clear of moving parts. Do not allow children to move or adjust the system.
- Do not wear jewelry (rings, watches, necklaces, etc.) during play, as items may become entangled in the net.
- Inspect the pole regularly for signs of corrosion, such as rust, pitting, or chipping. Repaint with exterior enamel paint as needed. If rust has penetrated the steel, replace the pole immediately.
- Before each use, check the system for proper ballast, loose hardware, excessive wear, and signs of corrosion. Repair any issues before use.
- Ensure the system is stable before each use.
Parts List
Backboard

Base

Support Pole

Screw Package

Top Support Pole

Tools Needed

Installation
Base Assembly

Insert Pin #12 into Tube #Y, then align the assembly with the corresponding hole on Base #5 and insert it into place.
Ensure that the larger holes on Tube #Y face the front and the smaller holes face the rear, as shown in the diagram above.

Secure Tube #Y to Base #5 using Hardware #17 (bolt and washer).

Attach Tube #6L to Base #5 and Wheel Bracket #10, then secure the assembly using Hardware #15.
Attach Tube #6R to Base #5 and Wheel Bracket #10, then secure the assembly using Hardware #15.

Secure the Wheel #11 into the Wheel Bracket #10 using Hardware #19.

Insert Tube #X into Tube #Y. Secure the connection using Plate #13 (faces rear), Plate #14 (faces front), Hardware #21, and Hardware #22.
Secure Tube #6L, Tube #6R, and Tube #X using Hardware #25. DO NOT TIGHTEN YET.

Insert Tube #W into Tube #X. Ensure the bracket at the top of Tube #W faces the rear.
Secure the connection using Plate #13 (faces rear), Plate #14 (faces front), Hardware #21, and Hardware #22.
Further secure the connection using Hardware #26.
Install Bracket #32 and Plate #24 onto the middle section of Tube #X.
Note: Orientation of Tube #W and Bracket #32 is critical. Please refer to the diagram above.

Assemble the Rebounding Plate #7, #8, and #9 together.

Secure the Rebounding Plate assembly onto the Tube #6L and #6R using Hardware #16. Tighten Hardware #14 installed in STEP 5.
Backboard Assembly

Install Rim #3 onto Backboard #1 using Hardware #28 and #20.

Install Plate #2 onto Backboard #1 and secure with Hardware #16.
Note: Orientation of Plate #2 is critical as shown in the diagram above.

Tilt the assembly and lay it against the ground.
Install Tube #27 and secure with Hardware #18.

Connect Tube #T to Tube #W using Hardware #30.
Connect one end of Tube #T to Tube #37 and secure with Hardware #28.

Connect Tube #S onto the top bracket of Tube #Q using Hardware #29.
Note: Ensure spacers from Hardware #29 go between Tube #S and Bracket #24.

Lay the Backboard Assembly upright on the ground and connect Tube #T to the lowest hole position on Bracket #2. Secure with Hardware #31.
Note: Ensure spacers from Hardware #31 go between Tube #T and Bracket #2. Longer spacer from Hardware #31 should go between Bracket #2.

Connect Tube #S to the Backboard Assembly to the highest hole position on Bracket #2. Secure with Hardware #31.
Note: Ensure spacers from Hardware #31 go between Tube #S and Bracket #2. Longer spacer from Hardware #31 should go between Bracket #2.

Attach the Net (#4) by looping it through each hook on the rim (#3).

Fill Base #5 with water and place a 50 lbs weight on the base before using the basketball hoop. Or put 150 lbs on the base (no water needed).
Cover the hole with Base Cover #23.

Use the handle to adjust the height of the backboard.
Installing the huupe ARENA Sensor Hub

Mounting bracket & clamp
The Mounting Bracket (#1) and Bracket Clamp (#2) come pre-assembled.
You will notice that there are a series of numbers on the top of the universal mounting bracket. Each number represents a different mounting depth for the bracket. The lower numbers represent shallow depths for thin portable backboards. Higher numbers correspond to deeper backboard frames, including most 60" and 72" backboards.
In order to get the most stable configuration for your backboard, you should use the lowest number possible to fit onto your backboard.
When mounting the huupe ARENA sensor hub over the backboard, it must be assembled to the correct depth ON THE GROUND FIRST. Do not climb the ladder and try to adjust the bracket depth at a high position.
If you are assembling the sensor hub onto a portable unit or any adjustable height system, we highly recommend lowering the rim height to the lowest possible setting.

Set the bracket depth
To determine the correct mounting number for your backboard, measure the depth of the frame of your backboard. This dimension will be from the “inside” of your glass surface to the back edge of the top frame member.
- For portable basketball systems, this frame measurement will likely be between 1" and 1 ¼". For this size of frame, positions 1 or 2 will be your bracket setting.
- For medium depth frames between 1 ½" and 1 ¾", positions 3 or 4 will be your bracket setting.
- For larger depth frames between 2" and 2 3/8", positions 5 or 6 will be your bracket setting. For even larger frames, use position 7.
To adjust the clamp position, remove the three screws and move the Bracket Clamp to the appropriate mounting holes. Use the alignment markings to help position the clamp correctly.
Once the desired clamp position is selected, reinstall and securely tighten all three screws.

Center & apply the adhesive
Align the huupe ARENA sensor hub with the center line of the backboard. Ensure it is aligned and peel off the double-sided adhesive tab on the left as shown in the image.
Do NOT peel the tab on the left unless you intend to remove the adhesive.

Tighten the mounting knob
Tighten the knob on the mounting bracket. DO NOT over-tighten, as this may cause the metal bracket to bend or bow.

Protective cap
Unscrew the protective cap on the LED strip.

Connect the LED strips
Connect the LED strip connector to the left and right connectors on the sensor hub as shown in the diagram above.

Cable tie mount
Install the cable tie mount to the frame as shown in the image above. Route the cable through the cable tie mount.

Route the power cable
Route the main power cable as shown in the image above.
Care and Maintenance
Backboard Cleaning
Recommended Materials:
- Soft 100% cotton cloth
- Standard glass cleaner
Clean the backboard using a soft cotton cloth and a standard glass cleaner, similar to typical household glass cleaning. Do not use abrasive materials or harsh chemical cleaners, as these may damage the surface and affect product performance or warranty coverage.
Rim Use and Safety
- The rim is intended for standard basketball play only. Hanging on the rim is not recommended.
- Excessive hanging, swinging, or high-impact use may result in damage to the rim, springs, mounting hardware, or support structure. Damage caused by improper use is not covered under warranty.
- Height adjustments should not exceed 10 ft (3.05 m) and should be performed under adult supervision.
Rust Prevention and Maintenance
To maintain proper operation, apply a light lubricant (e.g., WD-40 or equivalent) to all moving and pivot points every six (6) months or as needed.
Inspect the pole and metal components periodically for signs of rust. If corrosion is observed:
- Remove loose paint and surface rust
- Lightly sand the affected area
- Apply a rust-inhibiting primer
- Refinish with an exterior-grade matte enamel paint